
3D printing has changed how people create objects at home and in professional settings. This 3D printing guide covers everything beginners need to know, from how the technology works to choosing the right printer and materials. Whether someone wants to prototype product ideas, create custom parts, or explore a new hobby, 3D printing offers accessible entry points for all skill levels. The following sections break down each step of the process, helping readers move from curious observer to confident creator.
Table of Contents
ToggleKey Takeaways
- 3D printing builds objects layer by layer from digital files, with FDM and resin (SLA) printers being the two main technologies for beginners.
- This 3D printing guide recommends beginners start with an FDM printer in the $200-$400 range for the best learning experience without extensive safety requirements.
- PLA filament is the ideal starting material—it prints at lower temperatures, produces minimal odor, and costs $15-25 per 1kg spool.
- Proper bed leveling is the most critical step for successful prints; even auto-leveling printers benefit from occasional manual checks.
- Start with calibration prints and small test objects like a calibration cube or benchy boat to identify issues before tackling larger projects.
- Budget time for a learning curve—even experienced users encounter failed prints, so patience and troubleshooting are part of the process.
How 3D Printing Works
3D printing builds objects layer by layer from digital files. The process starts with a 3D model created in CAD software or downloaded from online repositories like Thingiverse or Printables. This model gets converted into instructions the printer can follow through a process called slicing.
Slicing software breaks the model into thin horizontal layers and generates G-code, the language that tells the printer where to move, how fast to travel, and when to deposit material. Think of it like giving the printer a detailed recipe for building an object from the ground up.
Most consumer 3D printers use one of two methods: Fused Deposition Modeling (FDM) or resin-based Stereolithography (SLA). FDM printers heat plastic filament and push it through a nozzle, drawing each layer like a very precise hot glue gun. SLA printers use UV light to cure liquid resin into solid shapes, producing smoother surfaces but requiring more post-processing.
The print head or build platform moves along multiple axes (typically X, Y, and Z) to position material exactly where needed. Each layer bonds to the one below it, gradually building the complete object. A simple keychain might take 30 minutes: a detailed figurine could run for 10+ hours.
Types of 3D Printers for Beginners
Choosing the right 3D printer depends on budget, intended use, and willingness to tinker. This 3D printing guide recommends beginners start by understanding three main categories.
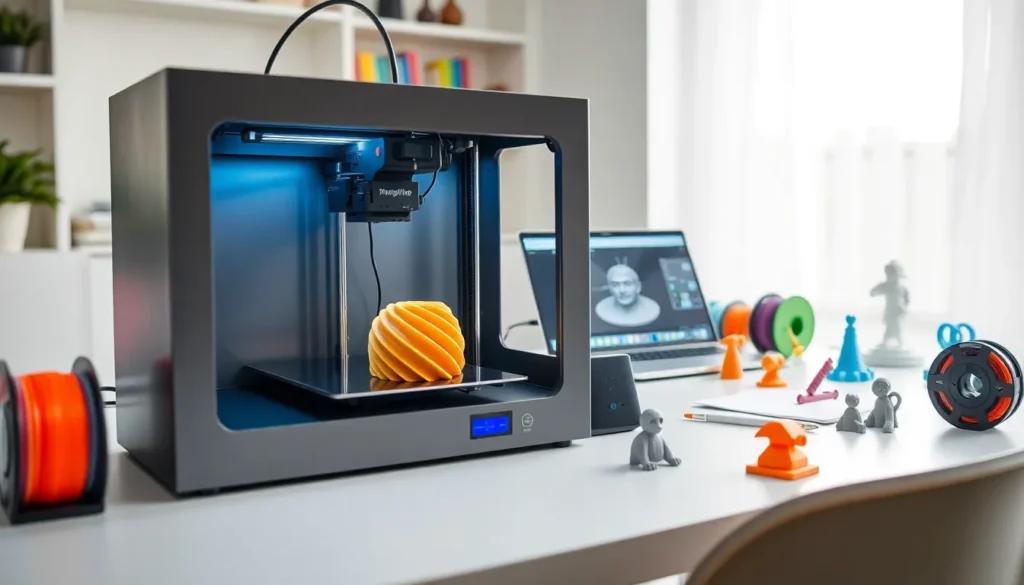
FDM Printers dominate the entry-level market. They’re affordable, use inexpensive filament, and produce functional parts. Popular beginner models include the Creality Ender 3 series and Bambu Lab A1 Mini. Prices range from $150 to $500 for capable machines. FDM works well for functional prototypes, household items, and larger prints.
Resin Printers (SLA/MSLA) excel at detail. They produce miniatures, jewelry, and dental models with smooth surfaces and fine features. The Elegoo Mars and Anycubic Photon lines offer solid entry points under $300. But, resin printing requires ventilation, protective equipment, and a cleaning station for post-processing.
Enclosed vs. Open Frame designs matter too. Enclosed printers maintain consistent temperatures and contain fumes, making them better for certain materials and safer for homes with pets or children. Open-frame printers cost less and allow easier access for modifications.
For most beginners, an FDM printer in the $200-$400 range provides the best learning experience. These machines teach fundamental concepts without demanding extensive safety precautions or consumable costs.
Essential Materials and Filaments
Materials define what a 3D print can do. This section of the 3D printing guide covers the most common options for FDM and resin printers.
PLA (Polylactic Acid) remains the go-to filament for beginners. It prints at lower temperatures (190-220°C), doesn’t require a heated bed, and produces minimal odor. PLA works for decorative items, prototypes, and low-stress applications. It’s also biodegradable under industrial composting conditions.
PETG offers better durability and heat resistance than PLA. It handles temperatures up to 70°C without warping and resists moisture better. PETG requires slightly higher print temperatures and works well for functional parts that need to survive real-world use.
ABS (Acrylonitrile Butadiene Styrene) provides strength and heat resistance but demands an enclosed printer and good ventilation. It releases fumes during printing. ABS suits engineering applications and parts exposed to higher temperatures.
TPU (Thermoplastic Polyurethane) creates flexible prints, phone cases, gaskets, and wearable items. It requires slower print speeds and direct-drive extruders for best results.
For resin printers, standard photopolymer resins work for most applications. Specialty resins exist for flexible, tough, or castable results. Resin costs more per volume than filament but uses less material for small detailed prints.
Beginners should stock 2-3 spools of PLA in different colors to start. A 1kg spool costs $15-25 and lasts through many projects.
Setting Up Your First Print
Getting that first successful print requires attention to a few key steps. This 3D printing guide walks through the process.
Assembly and Leveling come first. Most printers ship partially assembled. Follow the manufacturer’s instructions carefully, a crooked frame creates problems later. Bed leveling ensures the nozzle sits at the correct distance from the build surface across all points. Many newer printers include auto-leveling, but manual machines require paper-thickness gap checking at multiple corners.
Slicing Your Model turns STL files into printable G-code. Download a slicer like Cura, PrusaSlicer, or the manufacturer’s software. Import your model, select your printer profile, and choose a layer height (0.2mm balances speed and quality for most prints). The slicer shows estimated print time and material usage.
Bed Adhesion prevents prints from detaching mid-job. Clean the build plate with isopropyl alcohol. For PLA on glass or PEI sheets, this often suffices. Textured PEI plates grip filament well when properly heated. Some users add glue stick or hairspray for extra hold.
Start Simple with calibration prints and small test objects. A calibration cube reveals dimensional accuracy issues. A benchy boat tests bridges, overhangs, and detail. These quick prints identify problems before committing to larger projects.
Watch the first layer closely. Good first layers look smooth and properly squished. Strings, gaps, or lifting indicate leveling or temperature issues.
Common Mistakes to Avoid
New 3D printing enthusiasts often repeat the same errors. This 3D printing guide highlights what to watch for.
Skipping Bed Leveling causes most first-print failures. Even auto-leveling printers benefit from occasional manual checks. An improperly leveled bed produces poor adhesion, uneven layers, and failed prints.
Wrong Temperature Settings ruin filament. Each material has optimal ranges. Printing PLA too hot creates stringing and blobs: too cold causes layer separation. Check the manufacturer’s recommended temperatures on the spool label.
Ignoring Print Speed leads to quality problems. Faster isn’t always better. Complex geometries and fine details need slower speeds. Start with default slicer settings, then adjust based on results.
Poor Model Selection frustrates beginners. Models designed for 3D printing include support considerations and proper tolerances. Random downloads might require supports, scaling, or modifications. Look for “print-ready” or “tested” labels on model repositories.
Neglecting Maintenance shortens printer lifespan. Clean nozzles periodically to prevent clogs. Lubricate rails and lead screws as recommended. Check belt tension monthly. A well-maintained printer produces consistent results.
Unrealistic Expectations cause disappointment. 3D printing involves trial and error. Even experienced users encounter failed prints. Budget time for learning curves and troubleshooting.