
A great 3D printer is only half the equation. The right 3D printing tools make the difference between frustrating failed prints and consistent, high-quality results. Whether someone just unboxed their first machine or has been printing for years, the proper accessories save time, reduce waste, and produce better outcomes.
This guide covers the must-have 3D printing tools for every stage of the process. From bed preparation to post-processing, maintenance to safety, these essentials belong in every maker’s toolkit.
Table of Contents
ToggleKey Takeaways
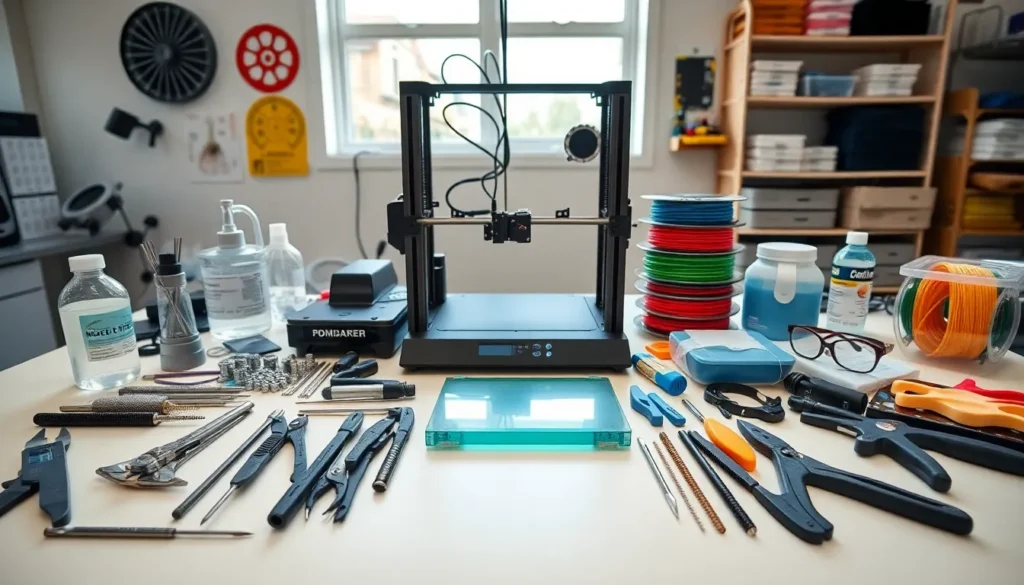
- Essential 3D printing tools span four categories: bed preparation, print removal and finishing, maintenance, and safety gear.
- Proper bed adhesion tools like PEI sheets, glue sticks, and isopropyl alcohol prevent warping and failed prints.
- Flush cutters, needle-nose pliers, and sanding supplies transform rough prints into professional-quality finished pieces.
- Regular nozzle cleaning with acupuncture needles and brass brushes keeps your printer running smoothly and prevents clogs.
- Digital calipers and infrared thermometers help troubleshoot print quality issues and ensure accurate results.
- Store filament in dry boxes with desiccant to prevent moisture damage that ruins print quality.
Preparation and Bed Adhesion Tools
Print success starts before the first layer drops. Proper bed preparation prevents warping, improves adhesion, and ensures prints stay put during long jobs.
Bed Surface Options
Different materials stick better to different surfaces. PEI sheets offer excellent adhesion for PLA and PETG without requiring adhesives. Glass beds provide a smooth, flat surface and release prints easily once cooled. Flexible magnetic build plates let users pop prints off with a simple bend.
Adhesion Helpers
Sometimes surfaces need extra grip. Glue sticks (the regular school supply kind) work surprisingly well for most filaments. Hairspray creates a thin, tacky layer that holds prints firmly. Specialty adhesives like Magigoo target specific materials when standard options fail.
Cleaning Supplies
Clean beds stick better. Isopropyl alcohol (90% or higher) removes oils and residue quickly. A scraper helps clear old adhesive buildup between prints. Microfiber cloths avoid leaving lint behind.
Leveling Assistance
Manual bed leveling requires the right 3D printing tools. A feeler gauge set provides precise measurements for nozzle height. Paper works in a pinch, but gauges deliver more consistent results. Some makers prefer dial indicators for even greater accuracy.
Investing in quality preparation tools pays dividends on every single print.
Print Removal and Finishing Tools
Getting prints off the bed safely takes the right approach. Finishing them properly requires additional 3D printing tools that every serious maker should own.
Removal Tools
A good print removal spatula is essential. Thin, flexible metal blades slide under prints without damaging the bed surface. Palette knives from art supply stores work well and cost less than specialty options. For stubborn prints, a plastic razor blade scraper reduces the risk of scratching glass or PEI.
Some makers prefer putty knives with rounded edges. These spread force more evenly and minimize the chance of cracking delicate prints.
Deburring and Support Removal
Support material rarely comes off cleanly. Flush cutters snip away supports close to the print surface. Needle-nose pliers grip and twist stubborn pieces free. A deburring tool cleans up rough edges where supports attached.
For tight spaces, dental picks reach areas that larger tools cannot. A set costs a few dollars and lasts for years.
Surface Finishing
Sanding smooths layer lines and prepares surfaces for painting. Start with 120-grit sandpaper and work up to 400 or higher for a polished finish. Sanding sticks and foam-backed pads help reach curved surfaces.
Heat guns can smooth certain filaments like ABS through controlled melting. This technique requires practice but produces glass-like surfaces when done correctly.
Files handle heavy material removal. A needle file set tackles small details and hard-to-reach spots. These 3D printing tools transform rough prints into professional-looking pieces.
Maintenance and Calibration Equipment
Printers need regular care to perform their best. The right maintenance tools keep machines running smoothly and producing accurate results.
Nozzle Care
Clogged nozzles ruin prints. Acupuncture needles or dedicated nozzle cleaning needles clear blockages quickly. A brass wire brush removes burnt filament from nozzle exteriors without damaging the metal.
Cold pulls (also called atomic pulls) use a length of nylon filament to extract debris from inside the hotend. Keep cleaning filament on hand for this purpose.
Spare nozzles save the day when cleaning fails. They’re inexpensive and wear out over time anyway, especially when printing abrasive materials like carbon fiber or glow-in-the-dark filaments.
Lubrication and Adjustment
Linear rails and lead screws need proper lubrication. PTFE-based dry lubricant works well for most printer motion systems. White lithium grease suits lead screws on some machines. Always check manufacturer recommendations first.
Hex key sets (both metric and imperial) handle most printer adjustments. A quality set with ball ends allows access to awkward bolt positions. Most 3D printing tools like these cost under $20 and last indefinitely.
Calibration Instruments
Digital calipers measure print accuracy and verify filament diameter. A decent pair costs around $15 and proves invaluable for troubleshooting dimensional issues.
A good thermometer verifies hotend and bed temperatures. Infrared models read surface temps instantly without contact. Temperature accuracy matters enormously for print quality.
Belt tension gauges ensure consistent motion system performance. Loose belts cause layer shifting and dimensional errors.
Safety Gear and Storage Solutions
3D printing involves hot components, sharp tools, and materials that require proper handling. Safety gear and storage solutions protect both makers and their supplies.
Personal Protection
Heat-resistant gloves prevent burns when handling hot prints or clearing jams. Silicone-tipped gloves offer dexterity while providing thermal protection.
Safety glasses shield eyes from flying debris during support removal and finishing work. They’re especially important when using rotary tools or heat guns.
A respirator or quality mask protects lungs from fine particles during sanding. When printing materials like ABS or resin, proper ventilation or an enclosure with filtration becomes essential.
Workspace Protection
A silicone mat under the printer catches drips and makes cleanup easier. It also protects work surfaces from hot tools and adhesives.
Fire safety matters. A small fire extinguisher near the printing area provides peace of mind. Smoke detectors in the room catch problems early. Never leave printers running unattended without monitoring.
Filament Storage
Moisture ruins filament. Dry boxes with silicone desiccant keep spools ready for use. Vacuum-sealed bags work for long-term storage. A filament dryer reverses moisture absorption in affected spools.
Organized storage saves time and frustration. Spool holders, wall mounts, or dedicated shelving keep materials accessible and tidy. Label everything, color and material type at minimum.
These 3D printing tools might seem like extras, but they prevent problems that cost far more in wasted materials and failed prints.